
17 September 2026
By Rob — bench hand joiner, time served
Mock Tudor Boarding Repair in Castleford
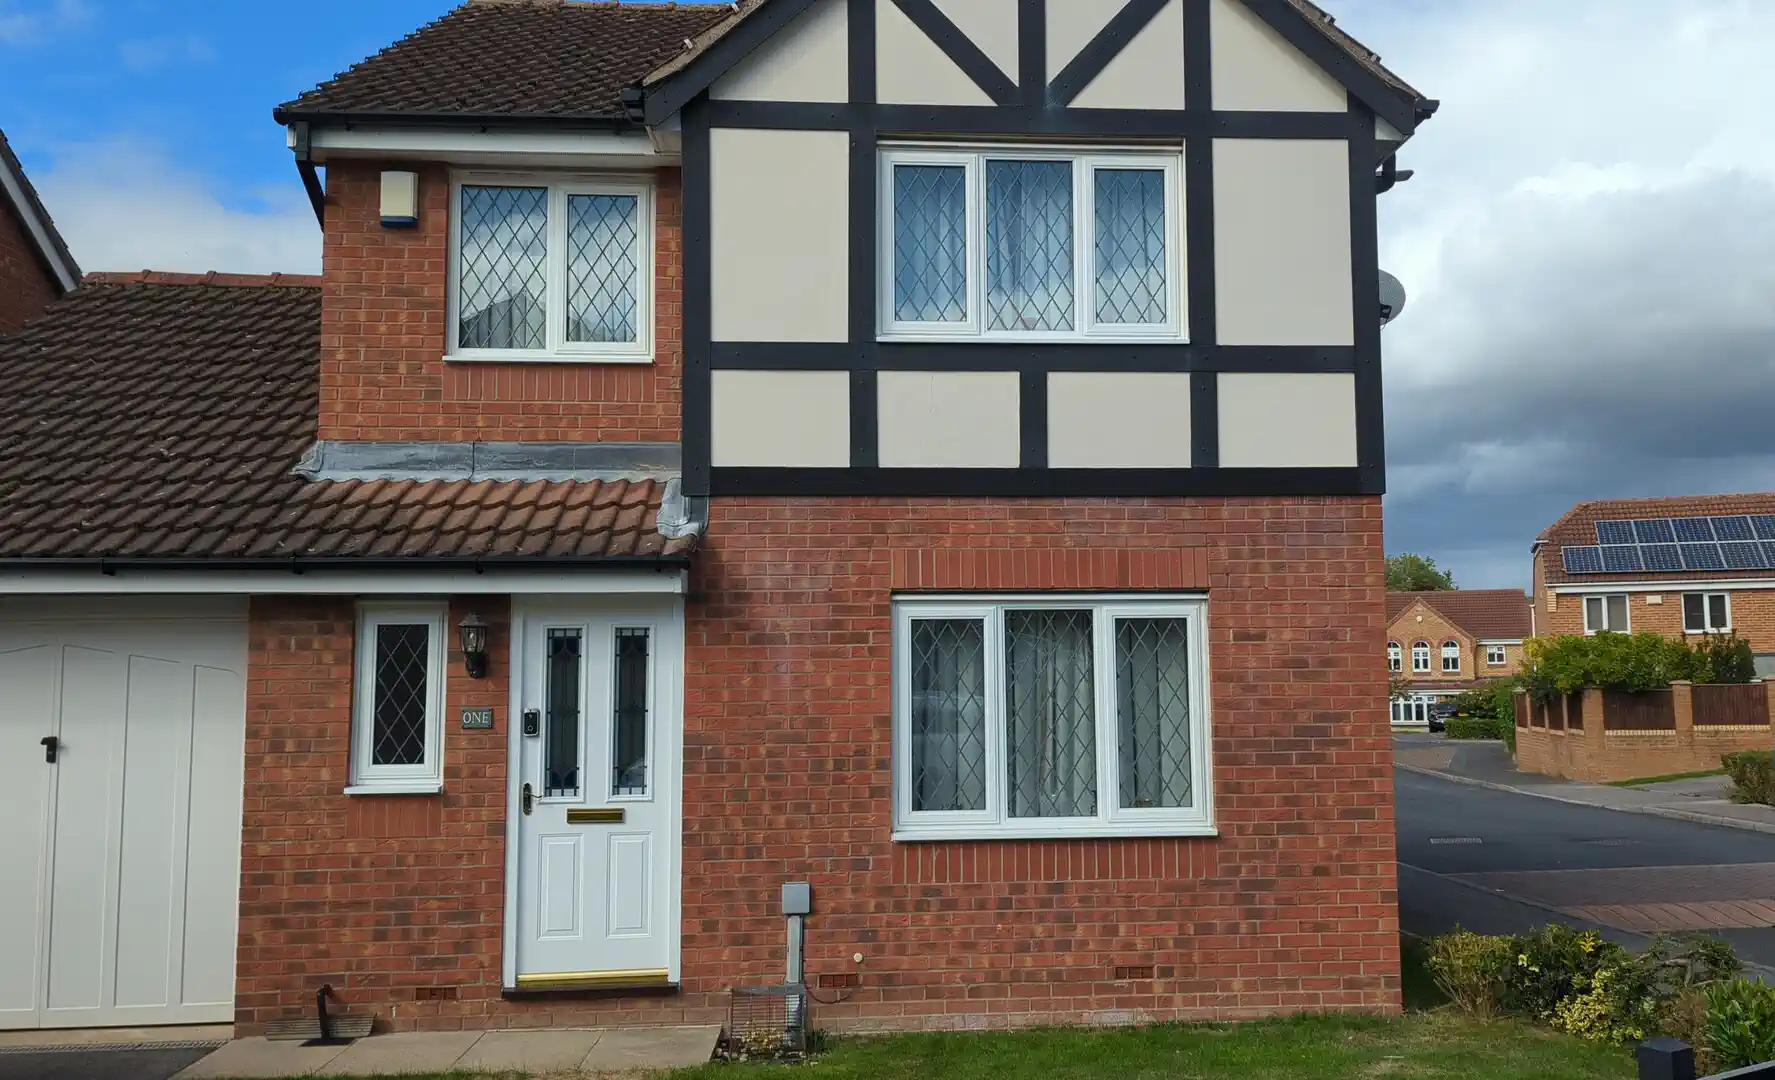
The owner of this house in Whitwood, Castleford had spent days trying to find somebody who would take the job on. Not because it was difficult, but because it was small — one board, at first-floor level, on a modern estate house.
The bottom horizontal board of the mock-Tudor frontage had distorted and pulled away from the upright it butted into. Everything else was sound. The job was to replace that one board and match it to the rest, rather than re-board the whole elevation.
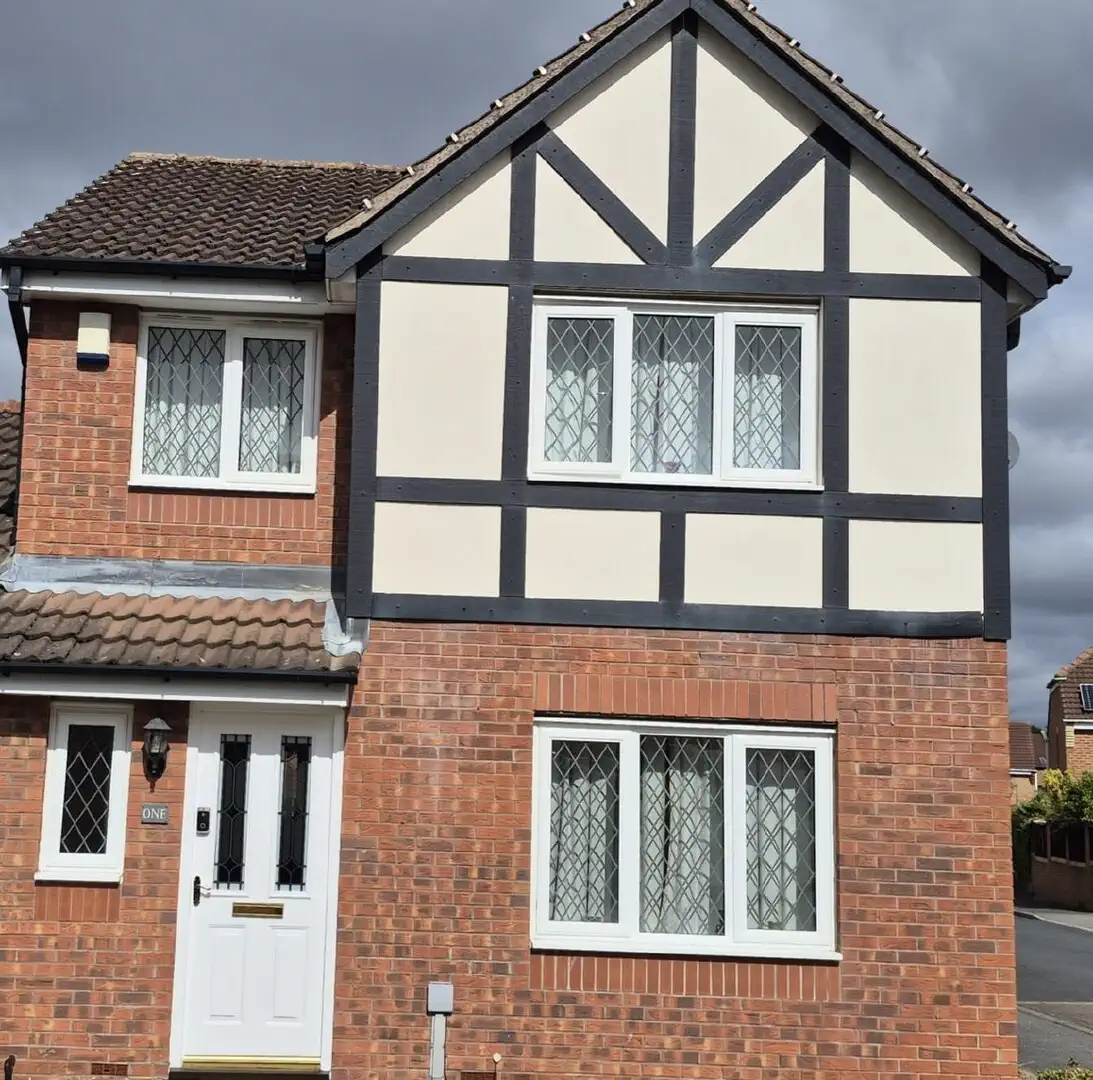
Why the lowest board is always the one that fails
Look at how the frontage is put together and the reason becomes obvious.
The render panels sit between the black boards. When it rains, water runs down the face of that render and has to go somewhere. Every horizontal board in its path catches some of it — and the lowest one, the board sitting on the junction between the rendered first floor and the brickwork below, catches everything coming off the whole panel above it.
So that board spends its life wet along the top edge. Whatever it is made of, it is the one that goes first.
What had actually gone wrong
The original board turned out to be MDF. That matters, because MDF and water do not coexist. Once the coating is breached anywhere — a fixing hole, a cut end, a split in the paint film — water gets into the board and it swells. It does not rot in the way timber rots; it distorts.
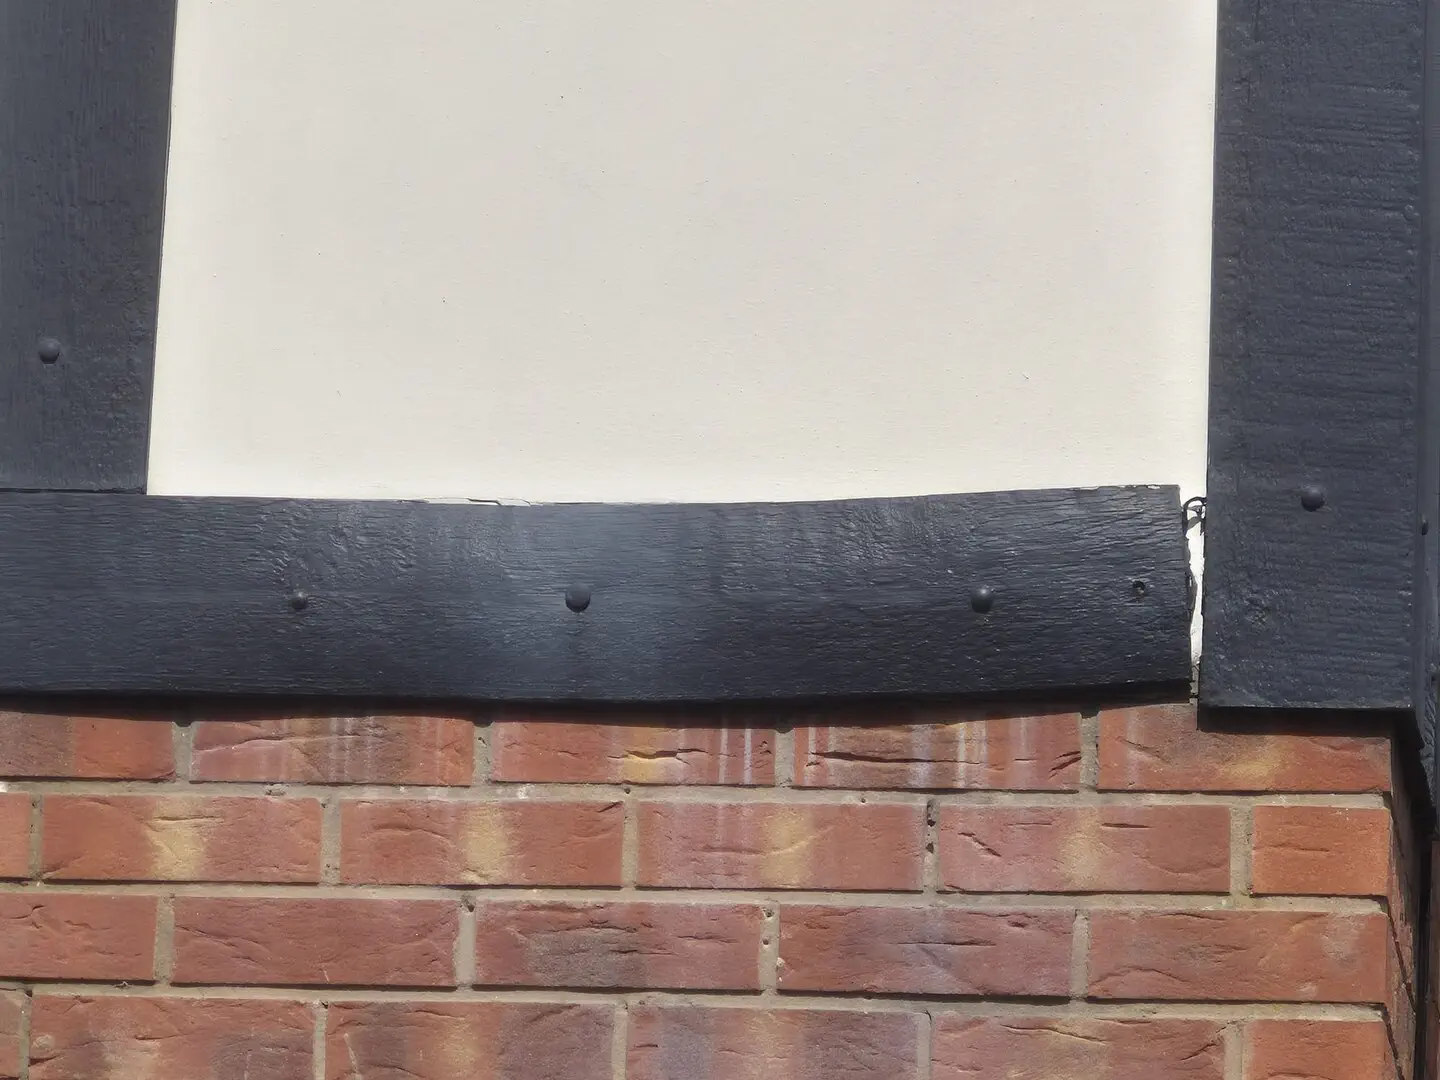
That photograph shows both symptoms at once. The board has dished along its length, and the right-hand end has pulled away from the vertical board beside it, leaving a gap. Once a board starts moving like that it works against its own fixings, and the gap only opens further.
Finding a board that matched
This was the part of the job that took the time, and it is the part most people underestimate.
The existing board measured 15mm thick. Matching a board is not just a question of colour — the width, the thickness and the grain pattern all have to be close, because the new one is going to sit directly against boards that have been there since the house was built.
The board chosen was a Swish C540Z Black Ash woodgrain uPVC Tudor board, 150mm wide and 20mm thick, in a 5 metre length. uPVC rather than MDF, because the replacement should not fail the same way the original did.
The owners quite reasonably wanted to see it before committing, so rather than ordering on the strength of a website photograph we waited for a physical sample to arrive so they could hold it against the existing boarding and decide for themselves. The board was ordered once they were happy with it.
That is not a delay worth apologising for. A board that is nearly right is worse than no board at all, because it draws the eye to exactly the spot you were trying to make disappear.
Fitting the new board
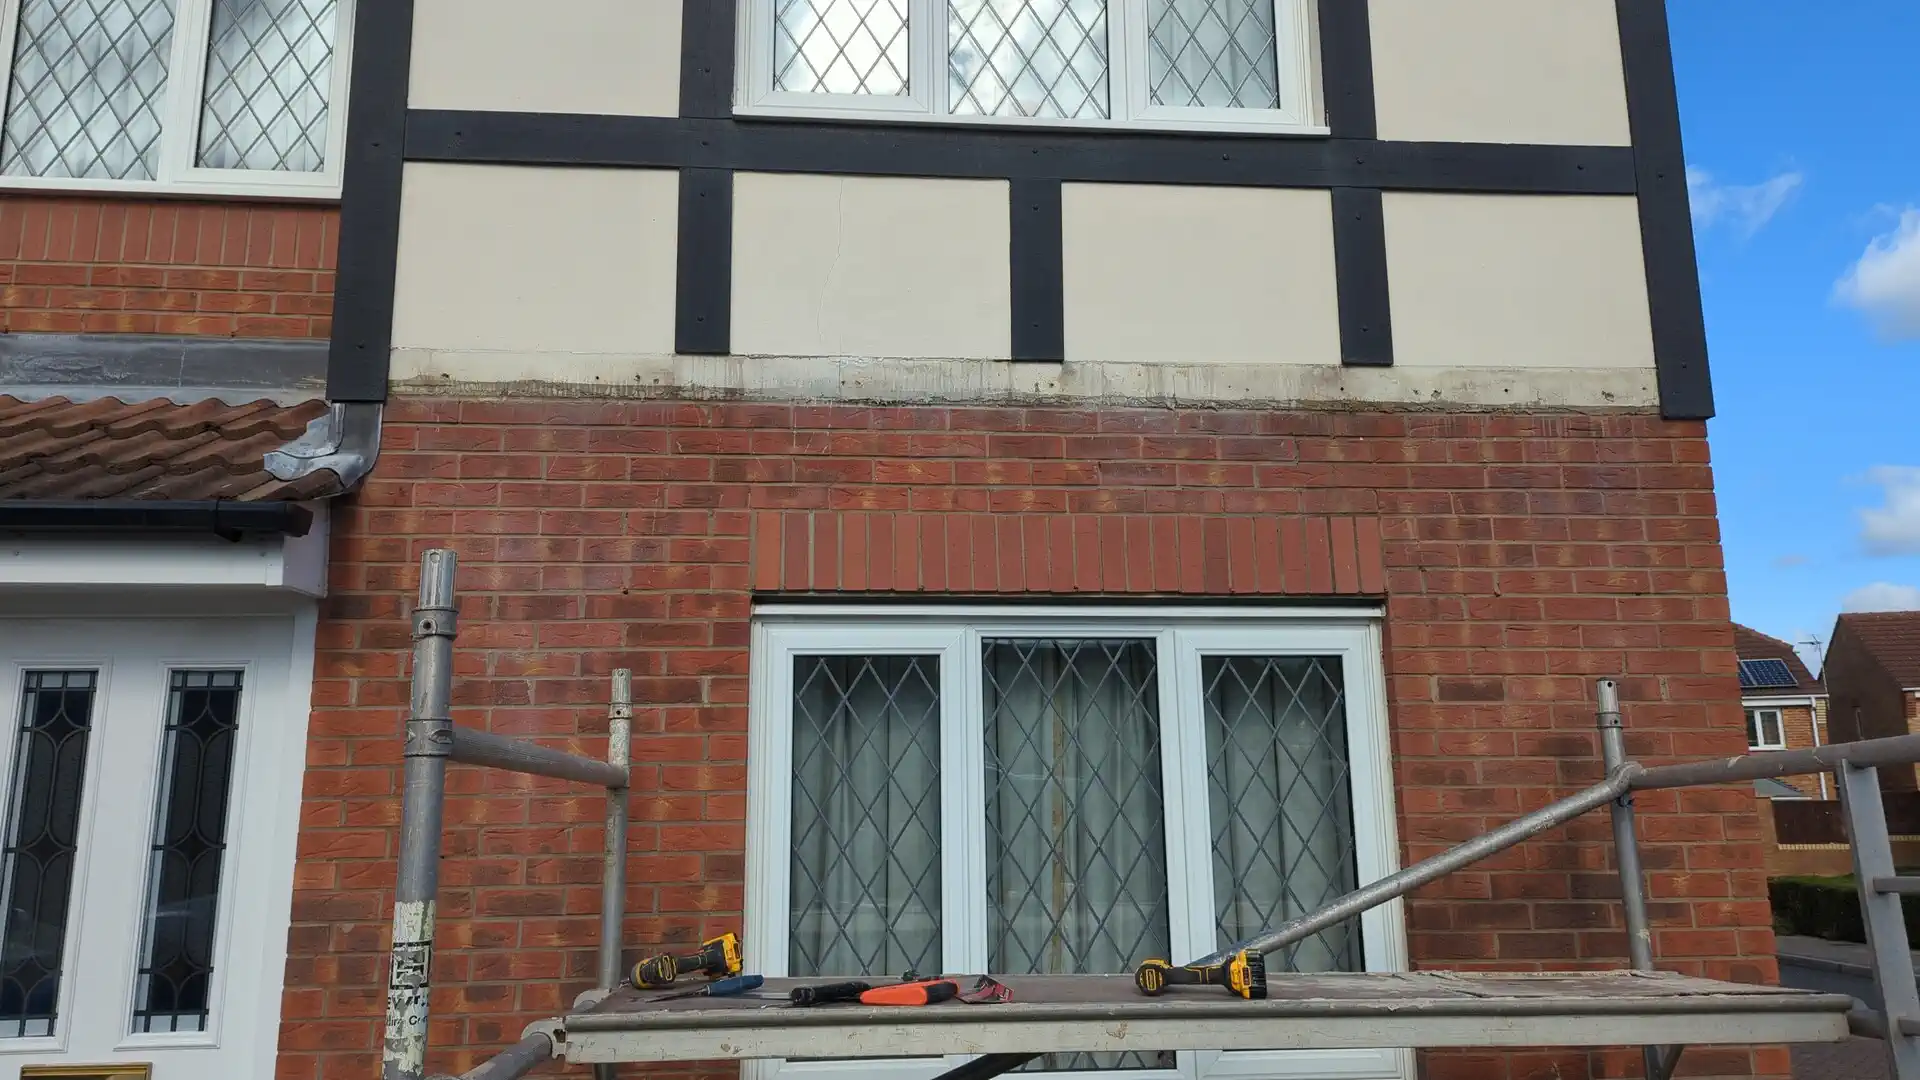
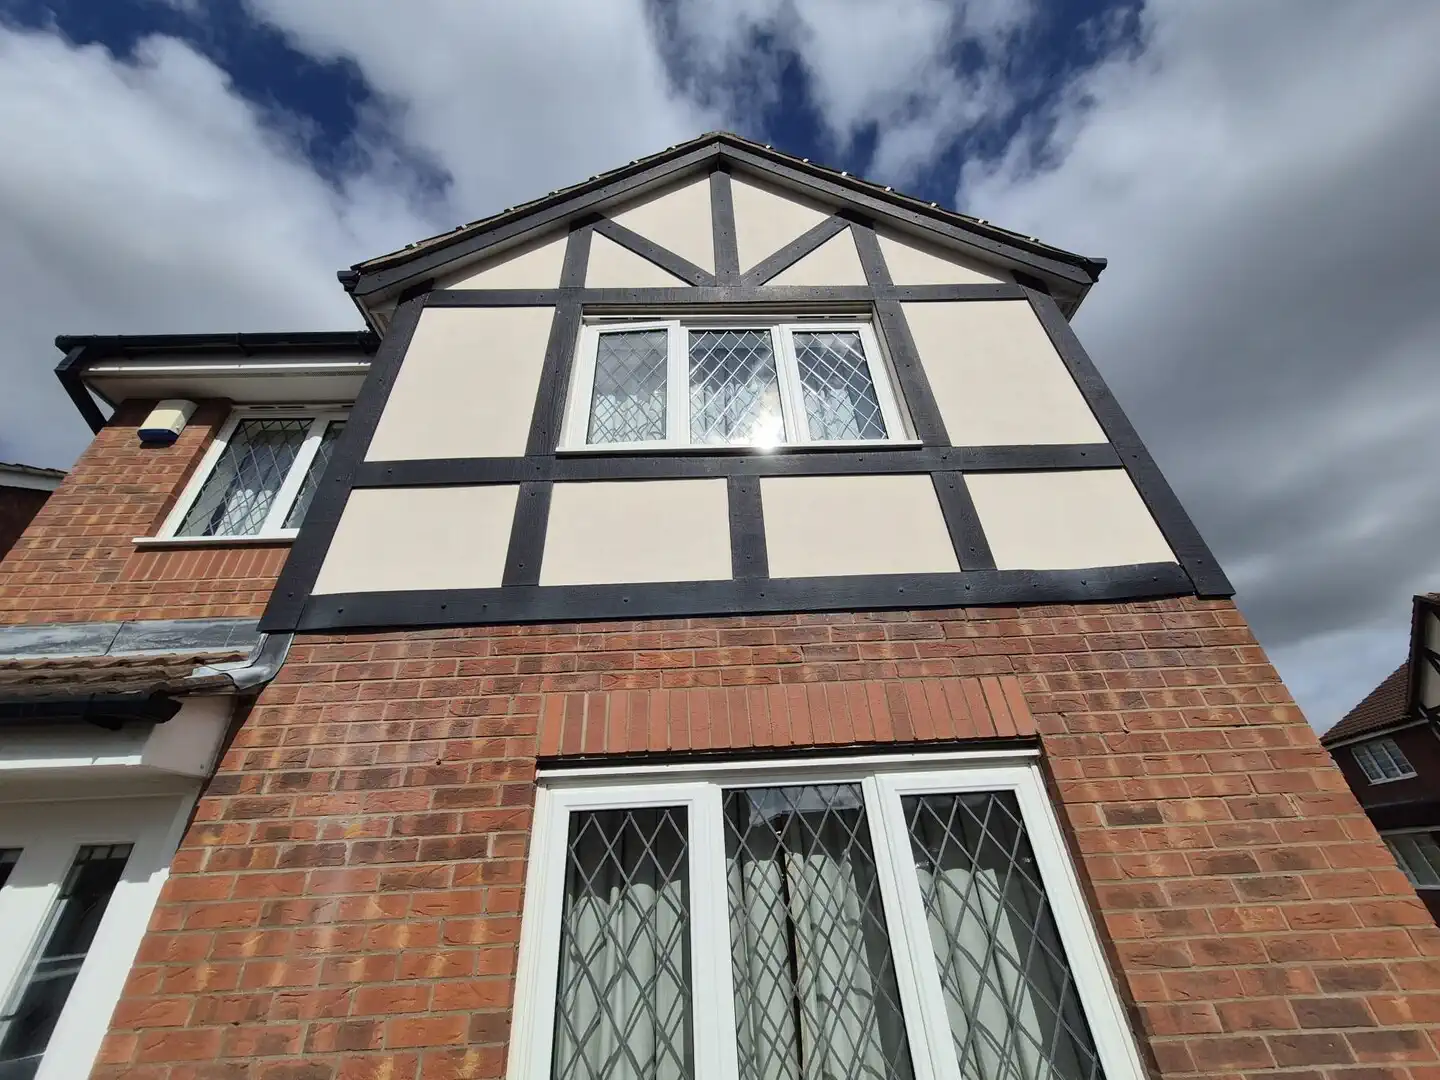
The failed board came off without disturbing the uprights or the backing behind it, and the new one was cut and fitted to the existing layout.
One detail was worth thinking about. The replacement is 20mm thick against the original 15mm, so where it meets the vertical boards it would stand proud by 5mm and the junction would read wrong. The answer is to rebate the concealed back of the new board locally at those junctions, taking it down to roughly the original thickness where it matters and leaving the full 20mm everywhere else. The face lines up, and the extra thickness is still there doing its job along the run.
It is screw-fixed with black covers, with provision for movement — uPVC expands and contracts more than timber does, and a board fixed solid at every point will eventually buckle rather than move.
The work was at first-floor level, so it was done off a scaffold tower rather than a ladder, which also gave the chance to look over the neighbouring boards while up there.
Why the whole frontage did not need replacing
There is a version of this job where somebody looks at a distorted board on a first-floor elevation, quotes to re-board the entire frontage, and everybody accepts it because matching one board sounds harder than replacing all of them.
It is harder. It is also a fraction of the work, a fraction of the disruption, and it leaves a house that still looks like itself.
The same thinking runs through everything here — keep what is sound, replace what has actually failed, and take the time to make the new work sit properly against the old. It is the same judgement as a rotten window rail or a repair-or-replace decision on period joinery, just on a modern house with a uPVC board instead of a piece of oak.
If you want the wider version of that argument, repair or replace sets out how the call gets made, and our cladding and panelling and maintenance and repairs pages cover the kind of work this sits alongside.
Mock Tudor boarding repairs in Castleford and Wakefield
This one was in Whitwood, Castleford. Heritage Joiners takes on mock-Tudor board replacement, cladding repairs, fascia and exterior timber work across Castleford, Wakefield, Pontefract, Normanton and the wider West Yorkshire area, including the small jobs other people will not turn out for.
If you have got a board that has bowed, split or come away, send Rob a photo — the whole elevation and a close-up of the failed board — and he will tell you whether it is one board or something wider.